Vincent Doan
(949) 346-7396
imagepaint.amazoncanvas@gmail.com
Part 1: ImagePaint - See it before build it!
Do you draw by hand or with a computer? Do you cut by hand or with a CNC machine? Whatever method you choose to draw and cut materials such as wood, marble, fabric, mother-of-pearl, etc. to create decorative products such as marquetry and material inlays; ImagePaint software will empower your creativity to turn your drawing into a Work of Art. It then takes your Work of Art and transforms it into shapes that you can use to cut the materials. This video contains a summary of the features in ImagePaint Production Pro. ImagePaint Design Pro is similar to ImagePaint Production Pro but without the features nescessary to take a finished design to a physical product.
Part 2: Existing marquetry and inlay challenges and our solutions

If you create marquetry or inlay products, whether with a knife, a scroll saw or with a CNC, you know already the challenges are not in the cutting technique, but in the designing of the artwork. We all face the same problem with selecting the appropriate material for a shape; how to cut exactly at a location on the sheet of veneer to fully utilize the natural wood colors, grains and figures; how to visualize the finished product in order to see the mistakes and make necessary changes before commit to cutting. This video illustrates how ImagePaint solves all these problems and more.
Part 3: Basic tools and supplies needed for marquetry and inlays
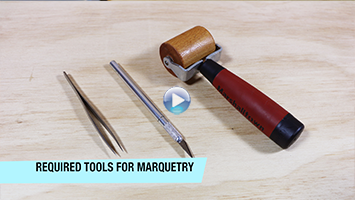
The tools and supplies used in this video are not the only tools and supplies appropriate for marquetry and inlay works. And we are not affiliated with any manufacturers or companies producing the products you see in this video. It is always best to experiment with different products in your area to find what works for you.
Part 4: How to install ImagePaint
Before installing ImagePaint, please make sure a 64-bit version of Adobe Illustrator is installed.
Part 5: How to retrofit an Epilog laser to prevent small cut pieces from disappearing
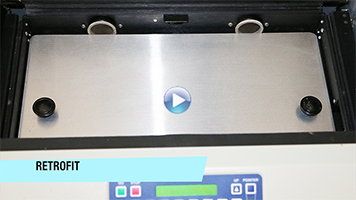
When cutting small pieces, the air suction can cause these pieces to disappear through the venting pipes. Please make sure your laser's warrantee is still valid with this retrofitted in placed before proceeding with the modification.
Part 6: How to label a sheet of veneer before scanning it into the computer
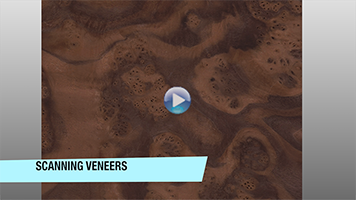
Before scanning a piece of veneer to our computer, there is a rule we need to follow when labeling the veneer (see this video). Please set up your scanner to produce only JPEG format. After the veneer is scanned, name the JPEG image the same as it appeared on the label.
Part 7: How to assign an Image Folder for ImagePaint to manage scanned images
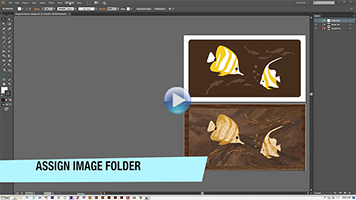
The Image Folder is where ImagePaint gets the images it needs to paint shapes. When you place one or more JPEG images in Illustrator and click the [Add Selected Images to Images Palette' button, ImagePaint will create a small icon image from each selected image and add it to the [Images] palette. If the selected image is not from the Image Folder, they will be copied to the Image Folder under a subfolder with the same name as the selected image name. If the subfolder does not exist, ImagePaint will create it.
Part 8: How to calibrate ImagePaint to work with your CNC machine
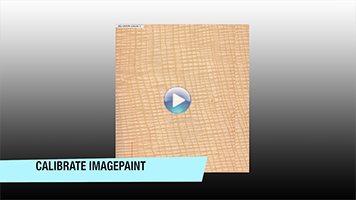
ImagePaint Production Pro need to be calibrated to your CNC machine or an Inkjet printer (if the shapes are to be printed on the veneer) to assure that each shape is cut exactly at the location it was designed in ImagePaint.
Part 9: How to validate the Vector Design before painting shapes with Images
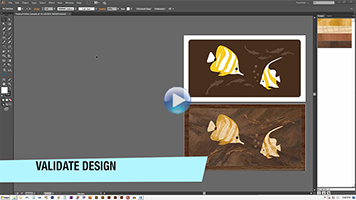
During the design process, Clipper Shapes and corresponding Master Shapes may become stranded or unlinked. Or, with Illustrator pathfinder tools, erroneous shapes may be created out of intention, which need to be deleted. Or, there are Regular Shapes that have not been clipped with any images. Or, Clipper Shape and its Master Shape have mismatched sizes. Or, there are shapes that have narrow segments, difficult for production. This video shows an example of how ImagePaint detects and displays shapes with tiny area.
Part 10: How to paint vector shapes with JPEG images
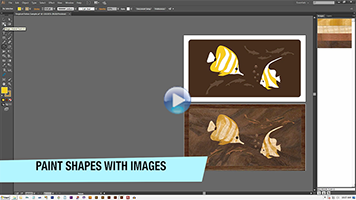
There are two tools for painting shapes with images: The Image Palette and the Image Picker Tool. The Image Palette is similar to Illustrator color palette, but it contains image swatch instead of color swatch. To paint shapes with an image, simply select the shapes and click on an image swatch in the Image Palette. The Image Picker Tool is similar to Illustrator Eyedropper Tool but work with images instead of regular color. To paint shapes with an image filled in another shape, select the shapes and click on the painted shape. See this video for more details.
Part 11: How to create and send toolpaths to a CNC machine
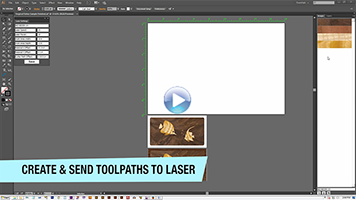
ImagePaint automatically creates a production art-board the size of the machine working area, we specified in the CNC Settings Palette and place Cutter Shapes (toolpaths) along with a Cutter image on this new art-board. With this method, all necessary operations needed to create the Cutter Shapes are done in one step. Please refer to the User Manual for information on how to create Cutter Shapes in multiple manual steps.
Part 12: How to update images to show the cut-out areas
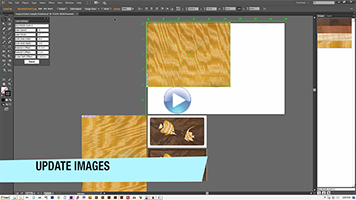
Once the toolpaths (Cutter Shapes) have been generated, the user can instruct ImagePaint to automatically update an image to contain the cutouts. With this feature we do not need to manually scan the used sheet of material again. This gives us the ability to accurately avoid the cutout areas when a sheet of material is to be reused.
Part 13: How to save laser power and speed settings for a material
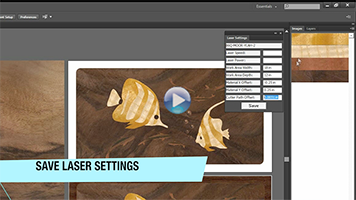
Use this feature to stored required power and speed settings as we experiment with various materials. To save or recall these settings for a material, click on an Image Swatch in the Image Palette, a Clipper Image, a Cutter Image or the Master Image. CNC settings are stored in the image icon metadata of the corresponding JPEG image. See this video for more details.
Part 14: How to excavate a wooden box for wood inlay
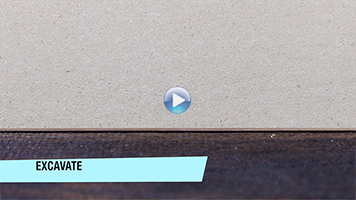
Excavate means removing the base material to be inlaid to the depth of the veneer thickness. Once excavated, the assembled cut pieces can then be placed and glue into the excavated area. This video shows how to generate toolpaths for excavating a lid of a wooden box.
Part 15: How to select and delete unused images
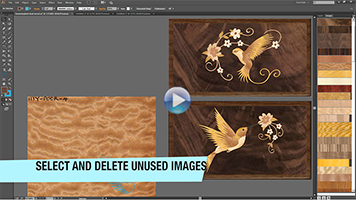
After a design is finished with all the images applied to vector shapes, we can select the unused Image Swatches and delete them. After these unused Image Swatches are deleted, what remain are images used in the design. At this point, we are ready to create a list of used images as a text file. This list can then be used to pull the veneers and get ready for the production phase.
Part 16: How to add all Images in the wood inventory to the Image Palette

When starting a new design, it is useful to have all the images in our inventory loaded into the Image Palette. This allows us to quickly locate the appropriate image for a shape. To see the image in its full size, double click its Image Swatch. Once the design is completed, the unused Image Swatches can be selected and deleted quickly (see the previous video).
Part 17: How to assemble the cut pieces to form an artwork
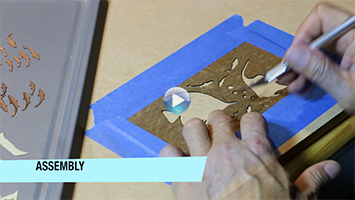
This video shows one common method used to assembled cut pieces to form an artwork, ready to be inlaid into a small wooden box.
Part 18: How to glue the assembled pieces to the lid of a wooden box
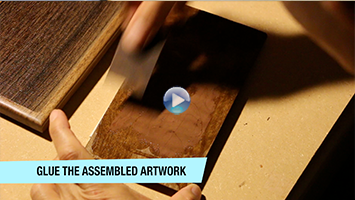
This video shows one common method used to glue an assembled artwork into an excavated area of a small wooden box.
Part 19: How to sand an assembled and glued artwork
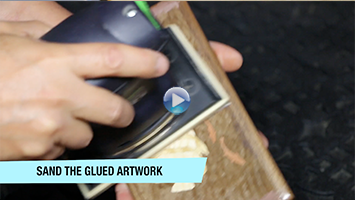
This video shows one common method used to sand an assembled artwork that has been inlaid into a small wooden box.
Part 20: How to apply a finish to the sanded artwork
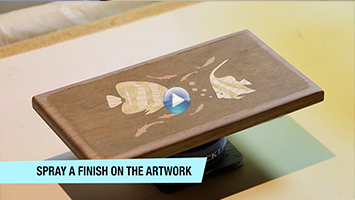
This video shows one common method used to apply a finish to an artwork that has been inlaid into a small wooden box.
Part 21: ImagePaint and Product Customization

Customization is an effective strategy embraced by many smart businesses to increase sales. With ImagePaint, the design and production processes are automated, so customized offerings such as variable sizes, variable material combinations etc. are easy, fast and efficient when redesigning and reproducing an existing product. The finished digital design can be exported as an image and sent to the customer for approval and price negotiation. This is a critical step for getting customer satisfaction, before the product is built.
Part 22: Estimate the cost of a product

Various statistics on the design such as Total Material Area, Total Number of Shapes and Total Linear Cut Length are automatically calculated and displayed at any point in the design stage. These statistics can be used in a custom equation to estimate material and labor cost of a product.
A finalist in the 2015 AWFS Visionary Award

System Requirements:
Windows OS, Adobe Illustrator CS6-CC